Three of America’s National Holidays are celebrated each year, not only with festivals, decorations and religious meanings, but just as equally by the food we traditionally prepare on those special evenings.
On Thanksgiving, of course, it’s turkey.
Easter is either lamb or ham, and Christmas/New Years, it’s quite often beef, specifically Prime Rib or Beef Tenderloin.
The holidays we celebrate during the warmer weather months, such as Memorial Day, 4th of July and Labor Day are typically, all grilled items.
Steaks, burgers, dogs, ribs and the like, all require a cooking method much different than does roasting.
Americans, on the whole, just seem to feel more comfortable behind a grill, with mitts and tongs in hand, than they do hanging out in the kitchen, waiting for something in an oven, to finish cooking.
Maybe it has something to do with, well, having something to do.
Roasts are not only a bigger commitment of money, but generally speaking, are a bit more stressful because you’ve only got one shot, to get it right.
Too much seasoning, over cooked, undercooked, dry… you name it, all can ruin the day. And you can’t throw another roast in the oven, like you can another burger on the grill.
So, with that said, and as Cattleman’s ARE the Meat Experts, we wanted to take some time to share with you some of our best tips and best practices to ensure that your upcoming holiday roast is everything you’re hoping it to be.
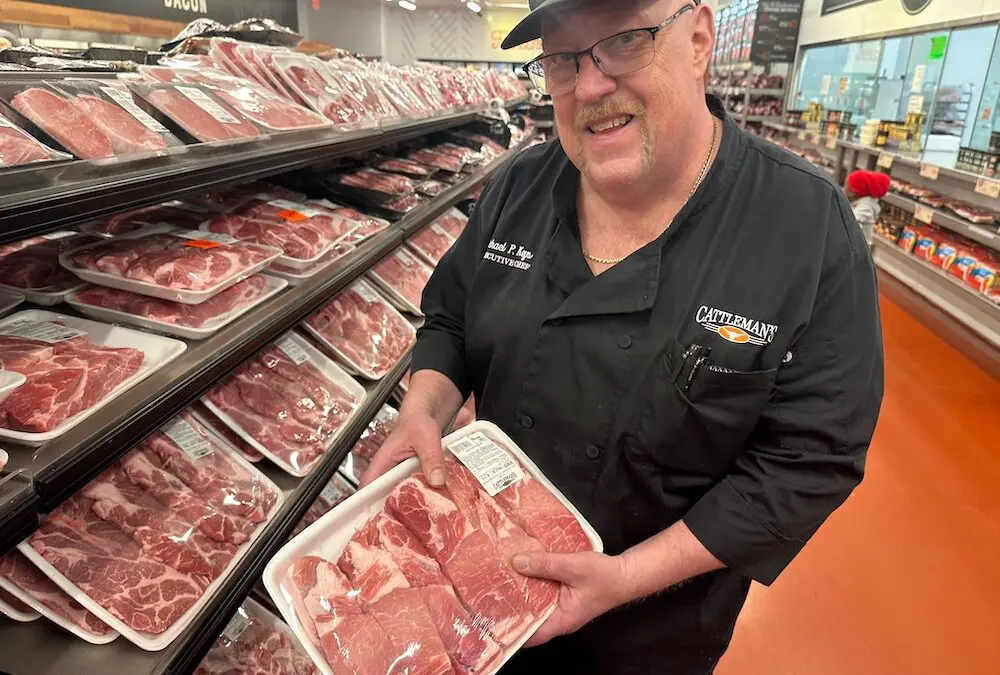
It all starts with the buying, and that’s at Cattleman’s.
Both the Prime Rib and the Tenderloin come from a similar areas on the animal, but as the tenderloin is a muscle less used, it is muscle fibers are finer, which, as a result, makes it more tender. It also, has less fat covering it.

Prime rib raw beef roast in the kitchen.
The rib, is a larger primal cut. Its muscle is larger, but yet still quite tender if cooked properly.
Both the rib and the tenderloin are excellent choices for roasting whole, or, either can be cut into steaks to be grilled or pan-fried.
Choosing and caring for your roasts.
Look for your roasts to have small specks of white fat, evenly distributed throughout the meat. This fat (called marbling), it melts into the meat while roasting and contributes to tenderness and flavor.
Meats with little or no marbling will be drier, tougher and less flavorful.
For a beef rib, leave a thin layer of fat on your roasts. External fat not only contributes to a juicier piece of meat but also adds flavor.
Let’s start with the Prime Rib (or) the Boneless Ribeye.
The rib can be roasted with its 7 bones attached, or, as a boneless ribeye.

In either case, we recommend that you trim off any excessive fat, season the meat, place the fat BACK on, then tie the roast in 1” increments from end to end ensure that the fat is secured and, to ensure that the roast cook more evenly. This will also ensure that your finished slices will be more uniform, end to end.
If you are roasting a prime rib with its rib bones attached, you can place your seasoned and tied roast (bones side down/fat side up) directly on a roasting pan, and its ready for the oven.
Searing is another great tip.
If you’ve chosen a boneless ribeye, you have one additional option which we recommend that you do, and that is to sear both sides of the seasoned and tied ribeye.
Searing is the technique of initially browning the exterior of a roast before cooking it in the oven.
Searing a boneless roast first, in a hot skillet, improves its color and flavor. It’s a particularly good technique for small roasts or very lean cuts of beef or lamb that only need a short cooking time.
In addition, and perhaps most important, searing helps to seal the meats exterior shell and lock in the flavorful juices of the roast.
Now as the boneless ribeye does not have the curved bone “rack” to keep it suspended off the surface of the roasting pan, you may want to consider placing it on a roasting pan rack which will suspend it above the bottom of the roasting pan.
Doing this will give you a more evenly cooked ribeye roast.
The Tenderloin.
If you’ve chosen to roast a beef tenderloin, you will have no fat to trim off but it should still be tied in 1” increments from end to end after seasoning.

The reason for this is to secure the “hook-like” piece of meat which is attached to the thicker “head” of the tenderloin, to the main piece of meat.
Secondly, you should fold over about 3 inches of the “tip” end to the main body of the tenderloin as well. Then, tie it.
Doing both of these tie-downs will give you a much more cylindrical and tube-like piece of meat, which will roast more evenly and cut more uniformly.
Just as with a boneless ribeye, we strongly recommend that you sear your seasoned and tied tenderloin on all sides, in a medium hot skillet, and then, place it on a roasting rack.

Sliced grilled tenderloin Steak roastbeef on wooden cutting board on dark background
Seasoning.
Before roasting either your rib or tenderloin, you may season it in a number of ways.
One way, is with a dry rub which can be liberally applied to the surface of the meat before it is seared and then roasted.
Cattleman’s has MANY to choose from.
Another popular seasoning is to lightly oil the meat and apply freshly minced garlic, freshly ground black pepper and a bit of dry or freshly chopped herbs such as basil, oregano, thyme or marjoram.
Avoid salting the meat before it is cooked. Salt tends to draw out the moisture from the roast and can make your meat dryer and as a result, tougher.
Salt your meat after it was been cooked and sliced for service.
Roasting.
There’s a lot of discussion (even among Chefs) as to the “right” temperature to roast meats.
Some Chefs prefer to start HOT and then reduce the temperature to something more moderate, for example, starting at 425 F then, shortly thereafter, reducing the temperature to, let’s say 350 F.
Others contend that a constant 325 F for a slightly longer period of time is best.
Having said that, the general consensus is the “Goldie Locks” zone of 350 F and we feel that is the best choice, especially if you have pre-seared your meat to develop its color and flavor before placing it on the oven.
Choosing your doneness, knowing your doneness.
Before you take the big step of placing your roast in the oven, you need to decide what doneness you want AND, more importantly, how you’re going to determine that.
The worst way, is predicting a certain doneness by the temperature of the oven, and the weight of the meat itself.
It’s one of the most common mistakes in roasting because there are so many variables, among them, roasting rack or no roasting rack, initial temperature of the meat, how many other dishes/food might be in the same oven at the same time and, is the oven’s temperature accurately calibrated?
The oven dial might say 350 F, but the oven might actually be 375 F inside. And that makes a BIG difference when you are gauging doneness by its size and the temperature of the oven.
Typically, for a medium-rare roasted tenderloin, it will take between 30 and 40 minutes, however the only truly accurate way to get the doneness you really want is to use a meat thermometer.
An “insta” read thermometer is the best type of meat thermometer to use for this purpose. It has a smallest diameter needle and reads temperatures quickly.
With an “insta” read thermometer, there is no need to leave the thermometer stuck in the meat while it is cooking in the oven. If, however, you have an oven with a built-in temperature probe, by all means use it, if you trust its accuracy.
Keep in mind that everyone’s idea of doneness differs. One person’s medium rare can be another person’s rare.
Below is a chart of general consensus.

Meat Doneness / Internal Temperature Guide
Allow 10 minutes for your Tenderloin Roast to rest and re-absorb its juices before carving then carve and season with salt, pepper and sauce. Enjoy!
If your rib roast is truly 5 to 6 lbs. you can expect it to be in the medium rare range of doneness in about 1 hour and 30 minutes, (or about 15 to 20 minutes per pound.) This means you’re removing the roast from the oven at about 135 F and then, letting it carry-over cook another 5 to 7 degrees to arrive at 140 F to 142 F or so, while it rests on your counter.
However, we still STRONGLY recommend you have an insta-read thermometer and check the internal temperature of the meat after 1 hour and then every 10 minutes afterwards.
Resting time or “Let it be..”
While in the oven, the meats juices have been driven, by heat, to the interior of the roast. Letting the roast rest, for at least 15 minutes once you finally remove it from the oven, will allow time for the “re-hydration” of the meat and allow the meat’s juices to be re-absorbed.
The result is a uniformly juicy and moist slice of beef from edge to edge, and it’s an important last step in the roasting process.

So, how much to buy?
If you’re buying a tenderloin you can expect about a 5% loss in trim before cooking and up to 10% loss while cooking.
A total of 15% loss would mean that if you bought a 5 lb. tenderloin, you can expect a final cooked yield of about 4 ½ lbs.
That would be 9 – 8oz portions.
Whole boneless ribeyes, are a bit larger. The average weight being around 6 ½ pounds. They generally need a bit more trimming.
You can expect as much as 10% trim loss and, up to 10% cooking loss. This total of 20% loss (maximum), would mean that if you bought a 6 ½ lb. boneless ribeye, you would typically yield about 5 ¼ lbs.
That would be a little over 10 ½ – 8-ounce portions.
Do however, expect people eat a bit more than the average serving size at holiday meals.
We hope that these roasting tips and best practices will help you to prepare this year’s holiday dinner with confidence and the complete assurance that it will be enjoyed from the first bite.